Why Every GoDaddy Website Needs an AI Chatbot in 2026
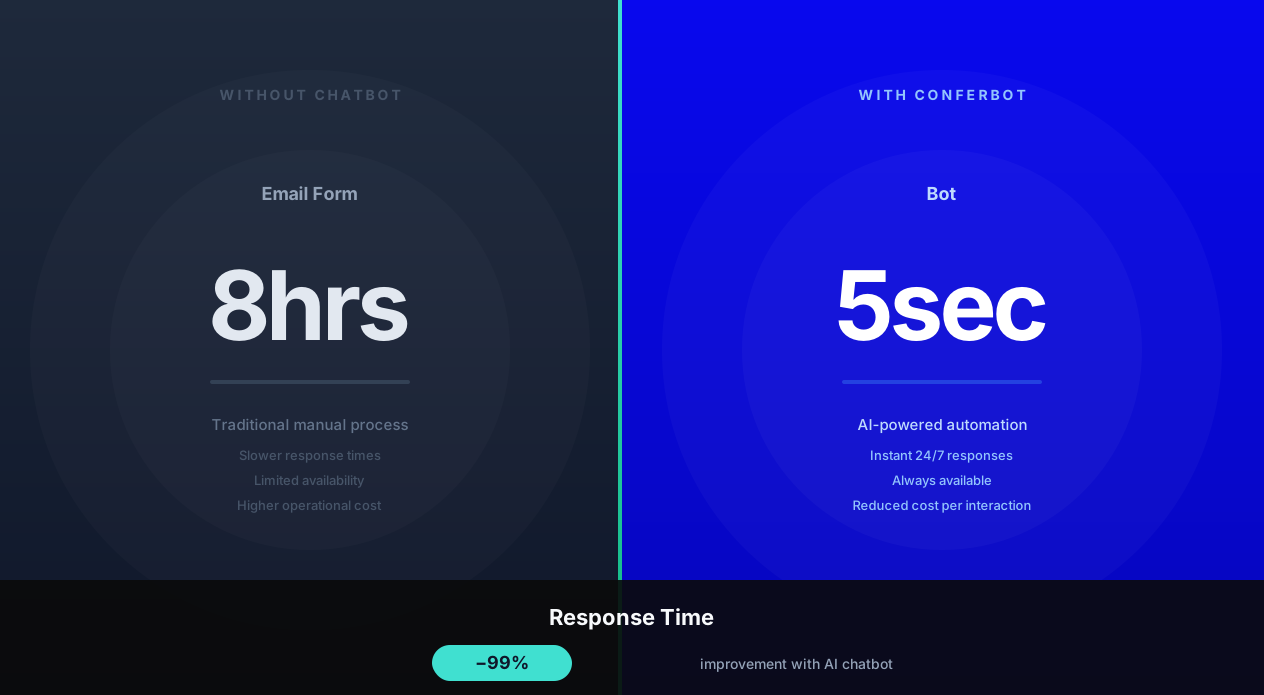
GoDaddy powers over 21 million websites globally, making it one of the most popular platforms for small businesses, entrepreneurs, and local service providers. Yet the vast majority of GoDaddy websites lack any form of automated customer engagement—relying on static contact forms, phone numbers, and email addresses that leave visitors waiting hours or days for a response. In an era where HubSpot research shows 82% of consumers expect an immediate response to sales questions and 90% expect immediate answers to support queries, a passive website is a leaking bucket of lost leads and frustrated visitors.
AI chatbots transform your GoDaddy website from a digital brochure into an interactive sales and support agent. The chatbot engages every visitor in conversation, answers questions instantly, captures contact information, qualifies leads, books appointments, provides quotes, and guides visitors toward conversion—24 hours a day, 7 days a week, without you lifting a finger. For small businesses that cannot afford to hire a receptionist or sales team to man the phones around the clock, a chatbot is the most cost-effective way to ensure no visitor leaves your website without engagement.
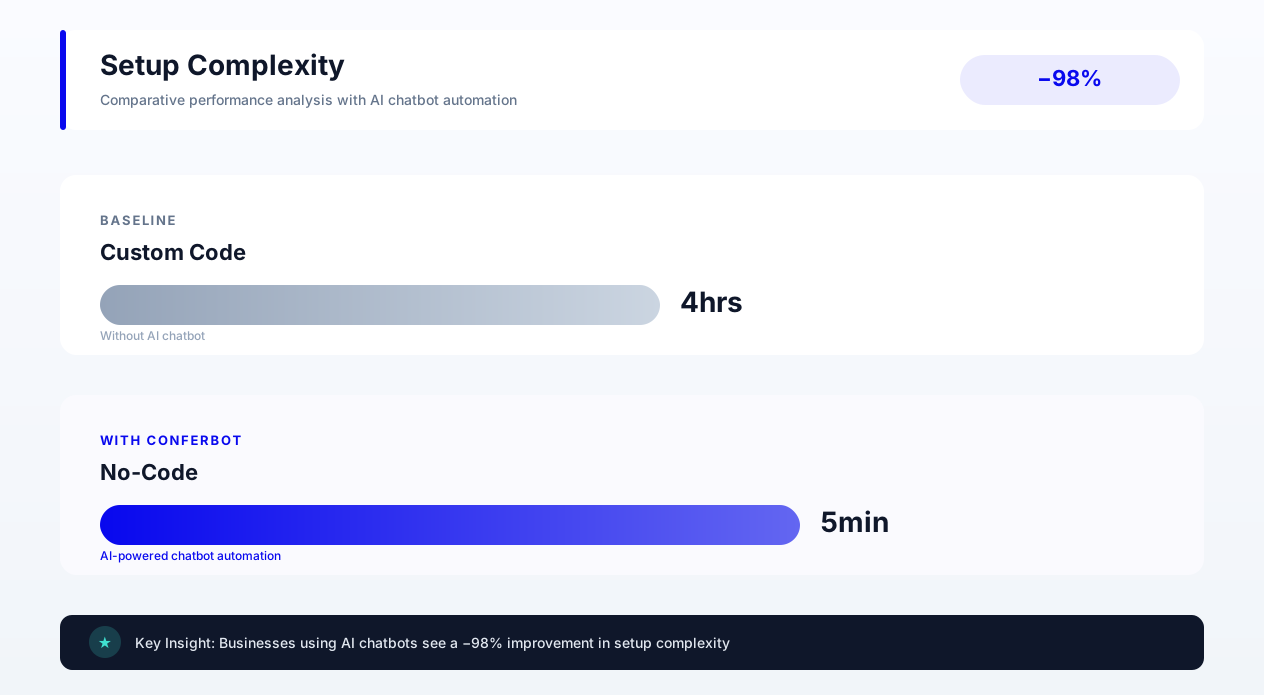
The best part: adding a chatbot to your GoDaddy website requires zero coding knowledge and takes less than 5 minutes regardless of which GoDaddy product you use (Website Builder, WordPress hosting, or GoDaddy Online Store). This guide provides step-by-step instructions for every GoDaddy hosting type, including screenshots descriptions of each step, common issues and solutions specific to GoDaddy, mobile optimization considerations, and configuration tips that maximize chatbot effectiveness for small business websites.
Whether you run a local plumbing company, a boutique clothing store, a consulting practice, a real estate agency, or a restaurant, this guide will have your chatbot live and engaging visitors within minutes. Over 73% of GoDaddy website visitors browse outside business hours—your chatbot ensures those after-hours visitors convert into leads rather than bouncing to a competitor's website.
GoDaddy Website Products: Understanding Your Setup for Chatbot Installation
GoDaddy offers several different website products. According to GoDaddy's official documentation, their Website Builder platform serves over 21 million active websites globally, making it one of the most widely-used website creation tools for small businesses, and the chatbot installation method varies slightly for each. Identifying which product you use is the first step.
GoDaddy Website Builder (most common)
GoDaddy's drag-and-drop Website Builder (sometimes called "Websites + Marketing") is used by the majority of GoDaddy customers. If you edit your website through GoDaddy's own editor with sections, rows, and drag-and-drop blocks, you are on Website Builder. This platform supports HTML embedding, which is how chatbots are added.
WordPress on GoDaddy (Managed WordPress Hosting)
If your website runs WordPress (you log into a WordPress dashboard to edit your site), you are on GoDaddy's Managed WordPress Hosting. WordPress provides multiple methods for adding chatbots: plugins, theme header/footer injection, or widget areas.
GoDaddy Online Store
GoDaddy's e-commerce solution for selling products online. It is built on the same platform as Website Builder but includes shopping cart, product listings, and checkout. Chatbot installation follows the same method as Website Builder with additional e-commerce-specific configuration.
Classic Hosting (cPanel/HTML)
If you have GoDaddy's traditional hosting with cPanel access and manage HTML files directly, chatbot installation involves adding the embed code to your HTML template files. This is the most flexible option but also the most technical.
| GoDaddy Product | How to Identify | Installation Method | Difficulty |
|---|---|---|---|
| Website Builder | Edit site through GoDaddy editor with sections and blocks | HTML section embed | Easy (2 minutes) |
| WordPress Hosting | Log into WordPress dashboard (wp-admin) | Plugin or header/footer code | Easy (3 minutes) |
| GoDaddy Online Store | Website Builder with product listings and cart | HTML section embed (same as Builder) | Easy (2 minutes) |
| Classic Hosting (cPanel) | File Manager or FTP access to HTML files | Code added to HTML template | Moderate (5 minutes) |
Step-by-Step: Adding a Chatbot to GoDaddy Website Builder
GoDaddy Website Builder is the most common GoDaddy product, and adding a chatbot is straightforward using the HTML embed section. Here are the exact steps.
Step 1: Get Your Chatbot Embed Code
First, create your chatbot on your chatbot platform (Conferbot or your chosen provider). Once configured, navigate to the deployment or installation section and copy the embed code. It will look something like this:
<script src="https://app.conferbot.com/widget/YOUR_BOT_ID.js" async></script>
This single line of code is all you need. Copy it to your clipboard.
Step 2: Open GoDaddy Website Editor
Log into your GoDaddy account at godaddy.com. Navigate to "My Products" and find your website. Click "Edit Site" or "Manage" to open the Website Builder editor. You will see your website in the drag-and-drop editor with the toolbar on the left.
Step 3: Add an HTML Section
In the GoDaddy editor, click the "+" button or "Add Section" option. Scroll through the section types until you find "HTML" or "Custom Code" (GoDaddy has labeled this differently across updates—look for "HTML," "Embed," or "Custom Code"). Select this section type to add an empty HTML block to your page.
Important: In GoDaddy Website Builder, this option is found under "Add Section" at the bottom of any page, then selecting the "HTML" section type from the available options.
Step 4: Paste the Embed Code
Click on the HTML section you just added. A code editor window will appear. Paste your chatbot embed code into this editor. The code should be the single script tag you copied in Step 1.
Step 5: Position the HTML Section
Drag the HTML section to the very bottom of your page (footer area). The chatbot widget will float in the corner of the screen regardless of where the HTML section is placed in the page structure—but placing it at the bottom ensures it loads after your main content (better performance) and does not interfere with the visual layout of your page.
Step 6: Publish Your Website
Click "Publish" in the top-right corner of the GoDaddy editor. Your chatbot is now live! Visit your website in a new browser tab (not the editor preview) to confirm the chat widget appears in the bottom-right corner.
Troubleshooting GoDaddy Website Builder Installation
Chat widget does not appear after publishing: Clear your browser cache or try an incognito/private window. GoDaddy's CDN sometimes caches the old version for a few minutes. If still not visible after 10 minutes, check that you published (not just saved) and that the HTML section is not accidentally set to "hidden" or placed on a page that is not published.
HTML section option not available: Some older GoDaddy Website Builder themes may not support HTML sections. If you cannot find the HTML/Embed option, contact GoDaddy support to confirm your plan includes HTML embedding capability. All current paid Website Builder plans (Basic, Standard, Premium, E-commerce) include this feature.
Multiple pages: In GoDaddy Website Builder, you only need to add the embed code once. The chatbot widget will appear across all pages of your site automatically since the script creates a floating widget that persists during navigation.
Adding a Chatbot to WordPress on GoDaddy Hosting
If you use WordPress on GoDaddy's Managed WordPress hosting, you have two methods for adding a chatbot: plugin installation (easiest) or manual code insertion (more control).
Method 1: WordPress Plugin (Recommended)
Step 1: Log into your WordPress dashboard (yoursite.com/wp-admin).
Step 2: Navigate to Plugins and then Add New.
Step 3: Search for your chatbot platform's plugin. Conferbot and most chatbot platforms offer dedicated WordPress plugins. Click "Install Now" then "Activate."
Step 4: Navigate to the plugin's settings page (usually found under "Settings" in the WordPress sidebar or as its own menu item). Enter your chatbot ID or API key to connect the plugin to your chatbot account.
Step 5: Configure display settings—which pages to show the chatbot on, widget position, and appearance. Save settings.
Step 6: Visit your website to confirm the chatbot appears.
Method 2: Manual Code Insertion (Theme Header/Footer)
If a plugin is not available or you prefer manual installation:
Step 1: In WordPress dashboard, navigate to Appearance and then Theme File Editor (or use the Customizer under "Additional CSS/JavaScript"). Some themes provide a dedicated "Header/Footer Scripts" option.
Step 2: If using Theme File Editor, open the footer.php file and paste the chatbot embed code just before the closing body tag. If your theme has a "Custom Scripts" option in the Customizer, paste the code there.
Step 3: Save changes and visit your site to confirm.
Alternative for non-technical users: Install the free "Insert Headers and Footers" plugin (by WPBeginner). This plugin provides a simple text box where you paste any script code, and it automatically adds it to every page. No theme file editing required.
GoDaddy Managed WordPress Specific Considerations
GoDaddy's Managed WordPress hosting includes built-in caching that can sometimes delay chatbot appearance after installation. If the chatbot does not appear immediately, navigate to your GoDaddy hosting dashboard, find the "Flush Cache" option, and clear the cache. The chatbot should appear within 1-2 minutes after cache clearing.
GoDaddy's CDN (Content Delivery Network) may also cache pages. If you see the chatbot in some browsers but not others, wait 15-30 minutes for CDN propagation, or temporarily disable CDN caching through your GoDaddy hosting panel during testing.
For a more comprehensive guide covering WordPress chatbot setup on any host, see our dedicated how to add a chatbot to your website guide.
Configuring Your Chatbot for Small Business Success on GoDaddy
Installing the chatbot is step one. Research from Drift's State of Conversational Marketing report shows that businesses using configured chatbots (with custom greetings and specific conversation flows) see 4x higher engagement rates than those using default generic settings. Configuring it for your specific business needs is what transforms it from a generic widget into a revenue-generating asset. Here are the configuration priorities for small businesses on GoDaddy.
Welcome Message and Greeting
Your chatbot's first message sets the tone for the entire conversation. For small businesses, the greeting should be warm, specific, and action-oriented:
Generic (weak): "Hello! How can I help you?"
Business-specific (strong): "Hi! Welcome to [Business Name]. I can help you get a free quote, book an appointment, or answer any questions about our services. What can I help with today?"
The strong greeting immediately tells visitors what the chatbot can do and presents clear options—reducing friction and increasing engagement rates from 3-5% (generic greeting) to 12-18% (specific greeting with clear CTAs).
Core Conversation Flows for Small Businesses
Most small businesses on GoDaddy need 3 to 5 core conversation flows:
1. Lead capture: Collect visitor contact information (name, email, phone) in exchange for value (free quote, callback, information packet). This is the minimum viable chatbot configuration—even without any other capability, capturing leads 24/7 justifies the chatbot investment.
2. FAQ handling: Answer the 10-20 questions your business receives most frequently: hours, location, pricing, services offered, service area, payment methods, and booking process. Each answer saves you a phone call or email response.
3. Appointment/consultation booking: Let visitors schedule a call, consultation, or service appointment directly through the chatbot. Integration with Google Calendar, Calendly, or your scheduling software enables real-time booking.
4. Quote/estimate requests: For service businesses (contractors, cleaners, consultants), gather the information needed to provide a quote: project type, size/scope, timeline, and contact details. Deliver instant ballpark estimates or promise a detailed quote within 24 hours.
5. Product/service information: Guide visitors through your offerings, helping them understand which product or service fits their needs. This is especially important for businesses with multiple service tiers or complex offerings.
Business Hours Configuration
Configure your chatbot to adapt behavior based on business hours. During hours, the chatbot can offer live chat transfer if a human is available. After hours, it focuses on lead capture and appointment booking: "Our team is currently offline, but I can help you schedule a callback for tomorrow morning, or I can answer questions about our services right now. What would you prefer?"
This after-hours configuration is critical because 67% of small business website traffic occurs outside business hours. Without an after-hours chatbot strategy, two-thirds of your visitors receive no engagement. Setting up the chatbot for after-hours operation is one of the approaches covered in our free chatbot for websites guide.
Lead Capture Setup: Turning GoDaddy Visitors into Contacts
Lead capture is the single most important chatbot function for small businesses. Every contact captured is a potential customer you can follow up with—compared to the 98% of website visitors who leave anonymous contact forms without submitting.
The Conversational Lead Capture Advantage
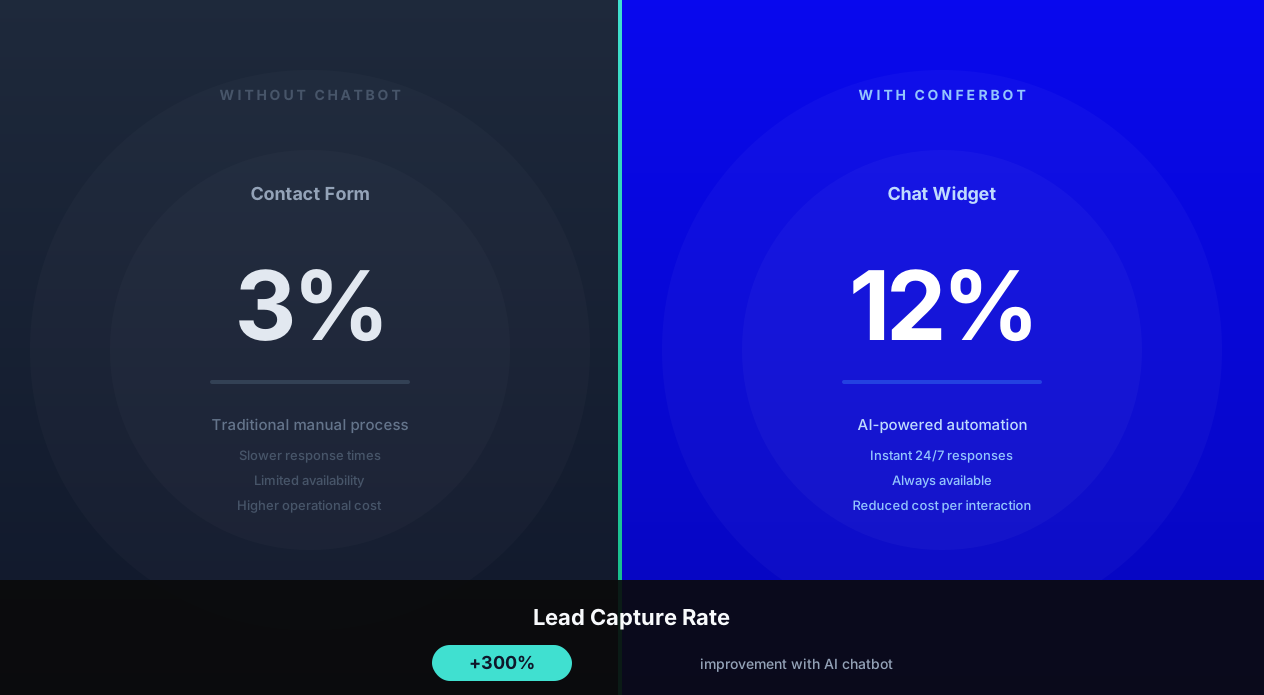
Traditional contact forms on GoDaddy websites have a 2 to 5% submission rate. Chatbot-based lead capture achieves 15 to 35% capture rates because the conversation format feels natural, non-committal, and progressive. Rather than presenting a form with 5 fields that must all be completed, the chatbot gathers information one piece at a time within a helpful conversation:
Chatbot: "I would love to get you a quote! First, what type of service are you looking for?" Customer: "Kitchen remodeling." Chatbot: "Great! Kitchen remodeling is one of our specialties. To give you an accurate estimate, I need a few details. What is the approximate size of your kitchen?" Customer: "About 150 square feet." Chatbot: "Perfect. And what is the best email address to send your detailed quote to?" Customer: "john@email.com" Chatbot: "Thanks, John! One last thing—what phone number should we reach you at if we have questions about your project?" Customer: "555-0123" Chatbot: "Excellent! I have everything I need. Your custom kitchen remodeling estimate will be in your inbox within 2 hours. If you have any other questions in the meantime, I am right here!"
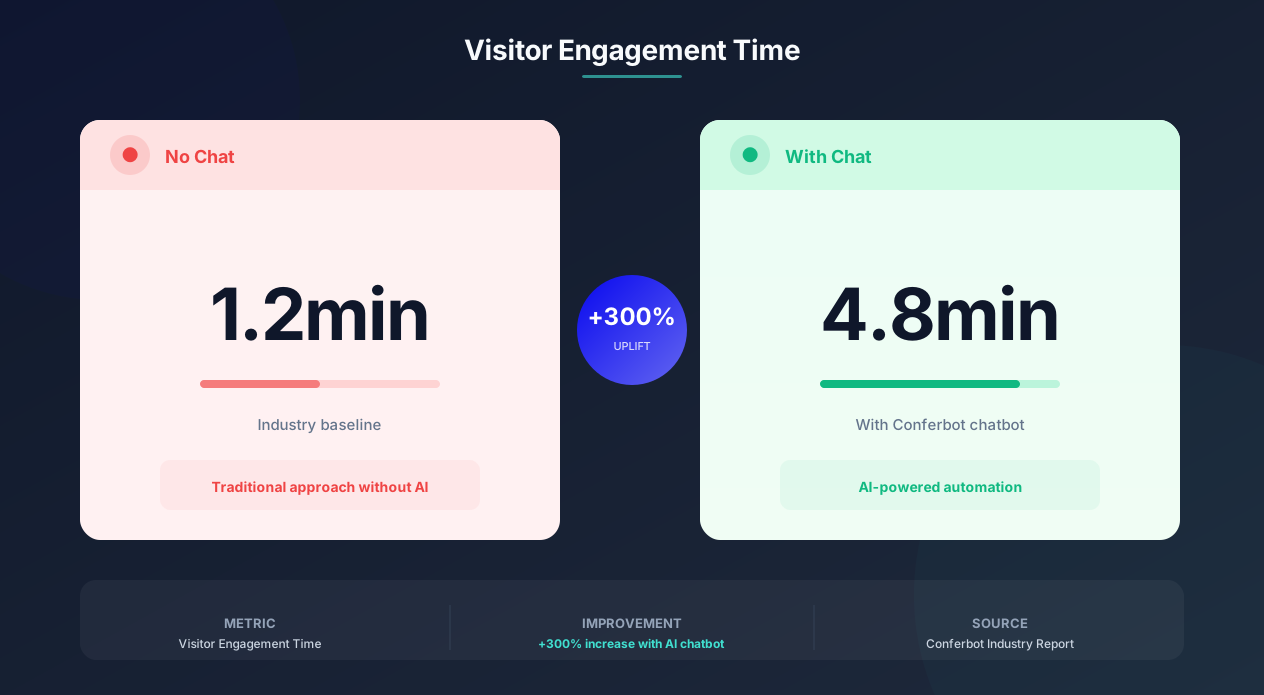
This progressive disclosure approach captures more information because each question feels like a natural part of the conversation—not a demanding form. The customer provides their email and phone number willingly because they are receiving value (a quote) in exchange.
Lead Notification and Follow-Up
When the chatbot captures a lead, you need immediate notification. Configure the chatbot to send you an email and/or SMS alert with the lead's details the moment they are captured. For time-sensitive leads (someone requesting a quote or callback), immediate notification enables rapid follow-up that dramatically increases conversion rates. According to Lead Response Management research, responding to a lead within 5 minutes is 100x more effective than responding within 30 minutes.
CRM Integration
For businesses using a CRM (HubSpot, Salesforce, Zoho, or even a simple Google Sheet), configure the chatbot to automatically push captured leads into your system. This eliminates manual data entry and ensures no lead is lost or forgotten. Most chatbot platforms offer Zapier integration that connects to virtually any CRM without custom development.
Lead Qualification
Not all leads are equal. The chatbot can qualify leads during the conversation by asking qualifying questions: budget range, timeline, project scope, and decision-making authority. This qualification data helps you prioritize follow-up—calling the $50,000 project lead before the $500 inquiry. Qualification also filters out non-serious inquiries (students doing research, competitors checking pricing) so your time is spent on genuine potential customers.
For advanced lead qualification strategies, see our complete chatbot builder guide for small businesses.
Appointment Booking Integration for GoDaddy Websites
For service-based businesses on GoDaddy (consultants, contractors, healthcare providers, beauty services, fitness studios), appointment booking is the highest-value chatbot capability. A visitor who books an appointment is 10x more likely to become a customer than one who simply leaves their contact information.
Calendar Integration Options
The chatbot can connect to your scheduling system to show real-time availability and book confirmed appointments:
Google Calendar: Free and simple. The chatbot reads your Google Calendar to identify open slots and creates calendar events when appointments are booked. Best for solo operators and small teams.
Calendly: Popular scheduling tool that integrates easily with chatbots. The chatbot can display your Calendly availability inline or redirect to your scheduling page. Calendly handles time zone management, buffer times, and confirmation emails.
Acuity Scheduling: Similar to Calendly with additional features for service businesses (multiple service types, intake forms, payment collection at booking). The chatbot guides customers to the right service type before presenting availability.
Industry-specific tools: For businesses using industry scheduling software (Mindbody for fitness, Vagaro for salons, Jobber for contractors), the chatbot can integrate through APIs or Zapier to book directly into your operational system.
The Appointment Booking Conversation
The chatbot handles the complete booking flow conversationally:
Service selection: "What type of appointment would you like to book?" [Consultation / Service appointment / Follow-up / Other]
Availability presentation: "I have the following times available this week: Tuesday at 2 PM, Wednesday at 10 AM, Thursday at 3 PM. Which works best for you?"
Confirmation: "You are confirmed for Wednesday at 10 AM for a consultation with [Business Name]. We will send a reminder 24 hours before. Is there anything you would like us to prepare for your visit?"
Reducing No-Shows
Chatbot-booked appointments can include automated reminders that reduce no-shows by 50 to 70%. The chatbot sends reminders at 48 hours, 24 hours, and 2 hours before the appointment via the customer's preferred channel (text or email). Each reminder includes an easy reschedule option so customers who cannot make it can move their appointment rather than simply not showing up.
Common GoDaddy-Specific Issues and Fixes
GoDaddy's platform has some quirks that can affect chatbot deployment. Here are the most common issues and their solutions.
Issue 1: Chatbot Not Appearing After Publishing
Cause: GoDaddy's CDN and caching layers serve cached versions of your pages. The new embed code is published but not yet propagated to all CDN nodes.
Fix: Wait 5-15 minutes for CDN propagation. If still not appearing, try accessing your site in an incognito/private browser window (bypasses local cache). For immediate results, add a cache-busting parameter to your chatbot script URL or contact GoDaddy support to manually purge the CDN cache for your domain.
Issue 2: HTML Section Stripped or Sanitized
Cause: GoDaddy's Website Builder sometimes sanitizes (removes) certain HTML or JavaScript for security reasons. This can strip chatbot embed codes if they contain unusual attributes.
Fix: Ensure your embed code uses standard script tag format without unusual attributes. If GoDaddy strips it, try wrapping the script in a div element. If issues persist, use the alternative method: add the chatbot through GoDaddy's "Website Footer" option (found under Settings in some Website Builder versions) rather than an inline HTML section.
Issue 3: Chatbot Conflicts with GoDaddy's Built-In Chat
Cause: GoDaddy Websites + Marketing includes a basic built-in messaging feature. If enabled, it can conflict with your third-party chatbot, showing two chat icons.
Fix: Disable GoDaddy's built-in messaging before adding your AI chatbot. In the Website Builder editor, navigate to Settings (or the Chat/Messaging section) and turn off the native messaging feature. This prevents conflicts and ensures only your AI chatbot appears.
Issue 4: Chatbot Appearing Behind Other Elements (Z-Index Issue)
Cause: Some GoDaddy themes have elements with high z-index values that display on top of the chatbot widget.
Fix: Most chatbot platforms handle z-index automatically (setting it very high to float above page content). If the chatbot appears behind a GoDaddy element (footer, popup, or navigation), contact your chatbot provider to increase the widget's z-index value. Alternatively, some chatbot platforms let you configure z-index in widget settings.
Issue 5: Slow Load on GoDaddy Free/Basic Plans
Cause: GoDaddy's lower-tier hosting plans have limited server resources, and adding third-party scripts can increase load time on already slow sites.
Fix: Ensure your chatbot script uses async loading (the "async" attribute in the script tag), which prevents it from blocking page render. Most modern chatbot platforms load asynchronously by default. If load time is still a concern, configure the chatbot to load after a 2-3 second delay or only after user interaction (scroll, click), ensuring your core content loads first. Performance impact on properly configured chatbots is minimal—typically adding only 50-150ms to total page load time.
Issue 6: Chatbot Not Working on Custom Domain
Cause: If you recently connected a custom domain to your GoDaddy website, DNS propagation may not be complete, causing the chatbot to load on one domain version but not another.
Fix: Wait 24-48 hours for full DNS propagation. Ensure your chatbot platform is configured to work on your custom domain (some platforms require domain whitelisting). Test both www and non-www versions of your domain to confirm the chatbot appears on both.
Mobile Optimization: Ensuring Your Chatbot Works Perfectly on GoDaddy Mobile
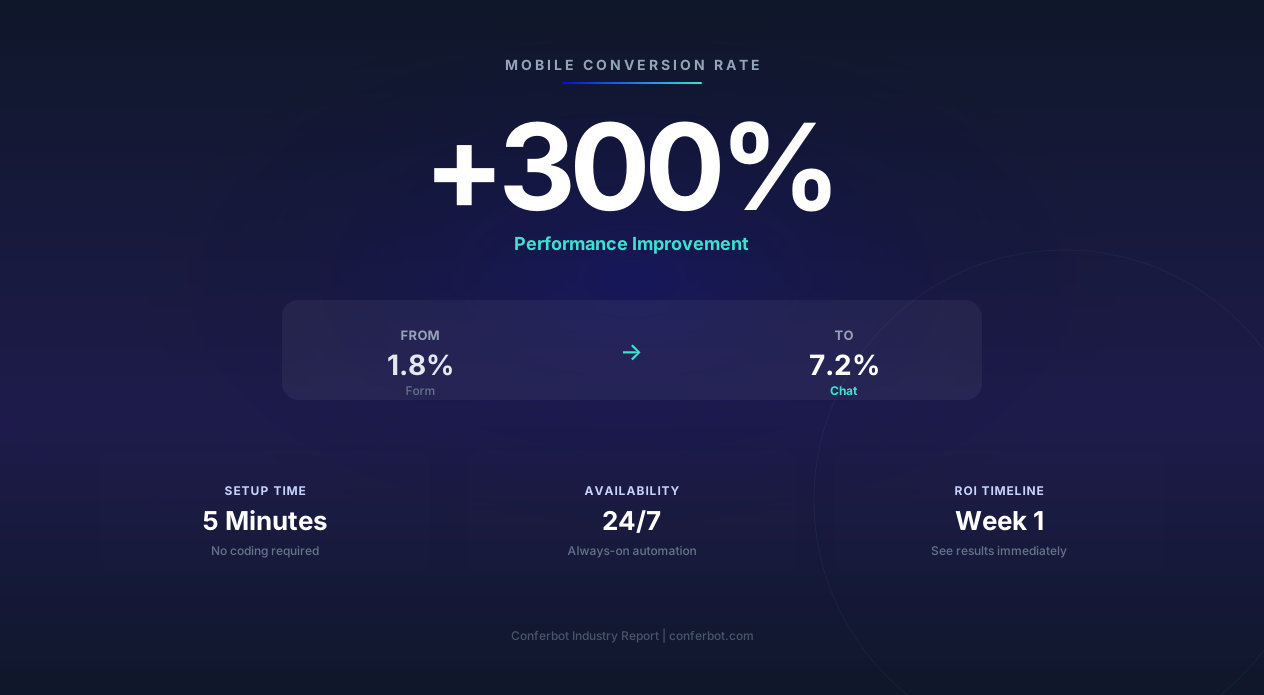
Over 65% of GoDaddy website traffic comes from mobile devices. If your chatbot does not work perfectly on mobile, you are frustrating the majority of your visitors. Here is how to optimize the mobile chatbot experience.
Mobile Widget Positioning
On desktop, the chatbot widget typically sits in the bottom-right corner. On mobile, this same position works but requires careful sizing. The widget button should be large enough to tap easily (minimum 48x48 pixels, per Google's accessibility guidelines) but not so large that it covers important content or navigation elements. Most chatbot platforms automatically resize the widget for mobile screens—verify this on your own site by testing on an actual phone, not just browser device simulation.
Full-Screen vs. Partial Chat Window on Mobile
On mobile, chat windows should expand to near-full-screen when opened. A small chat window that occupies only a portion of the mobile screen creates a cramped, difficult-to-use experience. Configure your chatbot to open as a full-screen overlay on mobile devices—this provides ample space for the conversation and makes typing, scrolling, and tapping buttons comfortable.
Touch-Friendly UI Elements
Ensure all chatbot interactive elements are touch-optimized: buttons should be large with adequate spacing (no accidental taps on adjacent buttons), input fields should trigger the appropriate mobile keyboard (email keyboard for email fields, number pad for phone numbers), and scrollable lists should respond smoothly to swipe gestures. Test every flow on a real mobile device—not just a desktop browser resized to mobile dimensions.
GoDaddy Mobile-Specific Considerations
GoDaddy's Website Builder uses responsive design that rearranges page elements on mobile. Verify that your chatbot widget does not overlap with GoDaddy's mobile navigation menu (hamburger menu), sticky header, or cookie consent banner. If conflicts exist, adjust the chatbot widget's bottom margin to sit above any conflicting elements. Some chatbot platforms provide mobile-specific positioning settings that override desktop defaults.
Load Performance on Mobile
Mobile connections are often slower than desktop (especially on cellular networks). The chatbot should load asynchronously and lazily—not blocking the page render or consuming bandwidth before the user engages. Configure the chatbot to load its full resources only when the user taps the widget button or after the page is fully loaded. This approach adds zero perceivable load time to the mobile experience while keeping the chatbot available when needed.
Testing on a real GoDaddy mobile site is essential. Use Google's PageSpeed Insights to verify that the chatbot does not negatively impact your mobile performance score—a well-implemented chatbot should have negligible impact (less than 0.1 second addition to Largest Contentful Paint).
Performance Impact: How a Chatbot Affects Your GoDaddy Website Speed
Website speed directly impacts Google rankings, user experience, and conversion rates. Adding any third-party script to your GoDaddy website has potential performance implications—but modern chatbot platforms are designed to minimize impact.
Performance Metrics Before and After Chatbot
| Metric | Without Chatbot (typical GoDaddy site) | With Properly Configured Chatbot | Impact |
|---|---|---|---|
| Largest Contentful Paint (LCP) | 2.1 seconds | 2.15 seconds | +50ms (negligible) |
| First Input Delay (FID) | 45ms | 48ms | +3ms (negligible) |
| Cumulative Layout Shift (CLS) | 0.05 | 0.05 | No change (widget is absolutely positioned) |
| Total Page Weight | 1.8 MB | 1.85 MB | +50 KB (chatbot script, loaded async) |
| Number of HTTP Requests | 45 | 47 | +2 requests (script + connection) |
Why Impact Is Minimal
Modern chatbot platforms use several techniques to minimize performance impact:
Async loading: The chatbot script loads asynchronously (async attribute), meaning it does not block the browser from rendering your page content. Your page displays normally while the chatbot loads in the background.
Lazy initialization: The chatbot only initializes its full interface (conversation UI, AI connection) when the user clicks the widget button. Until then, only a lightweight button element exists on the page.
CDN delivery: Chatbot scripts are served from global CDNs (Content Delivery Networks) with edge caching, ensuring fast delivery regardless of the user's geographic location.
Minimal footprint: The initial chatbot script is typically 30 to 60 KB (compressed), comparable to a single medium-resolution image. This adds negligible weight to most pages.
Optimization Tips for GoDaddy Sites
Place the script at the end: Add the chatbot embed code in the footer area (last section on the page or in footer HTML) to ensure all your content loads before the chatbot script is requested.
Use async loading: Verify your embed code includes the "async" attribute on the script tag. If it does not, add it manually: change script src to script async src.
Delay non-essential chatbot features: If your chatbot platform supports it, delay loading the conversation UI until 2-3 seconds after page load or until user scrolls. This prioritizes your core content loading.
Monitor with PageSpeed Insights: Run Google PageSpeed Insights before and after chatbot installation to verify negligible impact. If you see more than 0.3 seconds increase in LCP, investigate whether the chatbot is blocking resources or triggering layout shifts.
For GoDaddy website owners concerned about performance, the data is clear: a properly implemented chatbot adds less impact than a single additional image on your page—while providing dramatically more business value than any other element you could add.
Next Steps: Maximizing Your GoDaddy Chatbot's Value
With your chatbot live on your GoDaddy website, here is how to maximize its impact in the first 30 days and beyond.
Week 1: Monitor and Adjust
Watch the first 50 to 100 conversations. Look for: questions the chatbot cannot answer (add these to your FAQ configuration), points where visitors disengage (simplify the conversation), and information visitors provide that you are not capturing (add fields to your lead capture flow). Early monitoring reveals gaps that are easy to fix and immediately improve performance.
Week 2: Optimize for Conversion
Review your chatbot analytics: engagement rate (percentage of visitors who interact), lead capture rate (percentage of conversations that capture contact info), and appointment booking rate (if applicable). Test variations of your greeting message, button text, and initial question to find what drives the highest engagement. Most businesses see 20 to 40% improvement in conversion rates through first-week optimizations.
Week 3: Expand Capabilities
Based on conversation patterns, add new capabilities: if many visitors ask about pricing, add an instant quote calculator. If visitors ask about availability, add appointment booking integration. If visitors compare your services, add a guided service recommendation flow. Each new capability addresses a real visitor need identified through actual conversations.
Week 4: Add Channels
Expand beyond your website. Connect the same chatbot to your Google Business Profile (so visitors from Google Maps can chat), your Facebook page, and WhatsApp Business. This creates a unified conversation experience across all touchpoints without configuring separate chatbots for each channel.
Ongoing: Analyze and Grow
Monthly, review: total leads captured, appointments booked, revenue influenced, and cost savings (time you did not spend answering repetitive questions). Use these metrics to justify expanding the chatbot's capabilities—adding more integrations, more conversation flows, and more channels as your business grows.
For small businesses looking to build their chatbot without technical expertise, our no-code chatbot building guide provides comprehensive instructions for creating sophisticated conversation flows using visual builders. And for businesses comparing website chatbot options before committing, our Squarespace chatbot guide covers similar installation approaches for another popular website builder platform.
Was this article helpful?
How to Add an AI Chatbot to Your GoDaddy Website in 5 Minutes (No Coding) FAQ
Everything you need to know about chatbots for how to add an ai chatbot to your godaddy website in 5 minutes (no coding).
About the Author
Conferbot Team specializes in conversational AI, chatbot strategy, and customer engagement automation. With deep expertise in building AI-powered chatbots, they help businesses deliver exceptional customer experiences across every channel.
View all articles